Hello crafty peeps! Today, I'm sharing a fun tutorial on how I created this adorable Spring Window Mini Album using my Silhouette Cameo machine and the Doodlebug Design, Simply Spring Collection. It's perfect for photos of family, friends, everyday moments, birthdays, outdoor fun, and Easter!
First, let's take a look ...
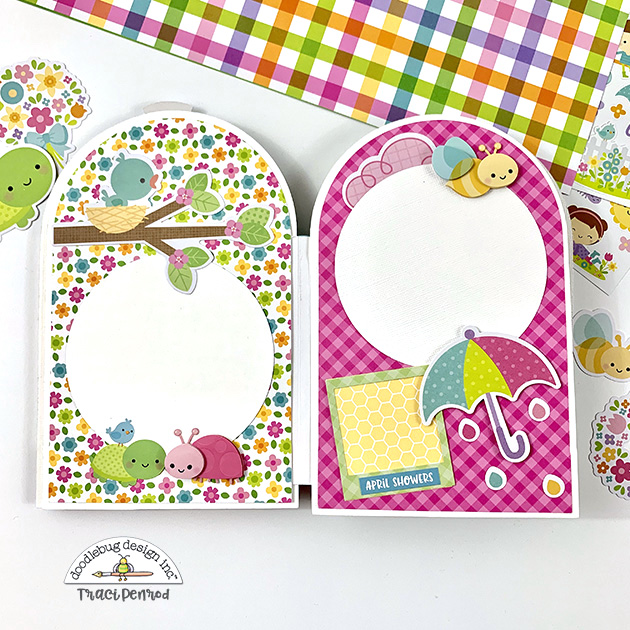
For the shape of the album, I used a Doodlebug cutting file called Simply Spring Window Flower Box. I chose some pretty patterns from the Simply Spring Collection and a few petite prints in dot / stripe and gingham / linen (links below).
Inside, the pages are filled with bright happy colors and the sweetest little die cuts and stickers of birds, bugs, flowers, and all things spring. I mixed in some embellishments from the older Spring Things Collection too. Check out the cute ladybug and bee from the Doodle-pops Blooming Bugs on the pages above. Love these!
I added lots of shiny enamel sprinkles throughout. Above, are some pretty flowers layered on the stickers.
I used a mix of 6x6 and 12x12 papers in this mini. I also chose embellishments from the Odds & Ends, Chit Chat, This & That sticker sheet, mini icons, and icons (links below).
Now, for the tutorial ...
Using the cutting file, I enlarged everything so that the window portion shown below measured approximately 4.8 x 6.5". Then I separated the pieces and duplicated the window frame so that I could create the shape of my album pages. Once duplicated, I right-clicked and released the compound path on the second window.
Next, I moved the background of the shape out of the way and erased (or deleted) all of the tiny inside pieces.
I then moved the original window frame aside and made the solid piece white (just to remind myself that this would be cut out of white paper). I wanted my pages to be the full size of the window plus the window box, so I welded the window box to the bottom of the solid window.
Now I had my full page shape so I duplicated it and cut out 12 pages and the rest of the pieces for the shutters.
For the shutters, I created some thin, folded strips that I adhered to the edge of the shutter that would attach to the album cover. These piece allowed my shutters to swing open.
I reinforced the thin pattern paper with a heavy white card stock layer for extra durability, and then attached my shutters to each side of my window.
Although I forgot to get a photo, I also cut the shutter pieces out of swimming pool petite prints again so that when opened, the shutters are blue on the outside and inside.
For the album binding I did a common "hidden hinge binding" technique. If you aren't familiar with how to create a binding like this, Kathy Orta has a good video here.
The white card stock that I scored for my binding was 4 3/4" x 9 1/4", but you may decide that you want the binding to run to the bottom of the album, which would be 5 1/2" by 9 1/4".
Once you have the hinge, just adhere a white page to each side of each hinge (two pages with the hinge sandwiched in between will be "one" page). The album will have 6 pages, including the front cover. Finally, I used a scrap piece of swimming pool dot to cover the binding on my spine.
Below, I've added the product links used to help make shopping easier. I hope this tutorial helps you to create a cute shaped mini of your own. Until next time, keep saving those memories!
Blog * Shop * Facebook * Instagram * Pinterest
Supplies: As an Amazon Associate, I earn from qualifying
purchases. Affiliate links are
used in this post at no additional cost to you. I receive a small amount of
compensation when you click through and shop using the provided links. This
helps me to continue building my small business. Thank you!


No comments:
Post a Comment