Thursday, November 28, 2019

Doodlebug Fall Friends Thanksgiving Mini Album

Happy Thanksgiving!! Today, I'm sharing an older project since, well ... it's Throwback Thursday, I’m cooking turkey and don't have a chance to make a new Thanksgiving project, lol! But hey, this one is super cute thanks to a 2015 Doodlebug collection called Fall Friends. To read more about how I made this, visit the original post here.
 
 
To purchase the instructions to make this album visit:


To purchase the instructions to make this album visit:
   
I hope you all have a wonderful Thanksgiving holiday! Since this Fall Friends collection is an older one, I've added product links to the Doodlebug Pumpkin Spice collection that would make a great substitution. It's adorable and you can simply change out the pilgrims for woodland creatures! 
 
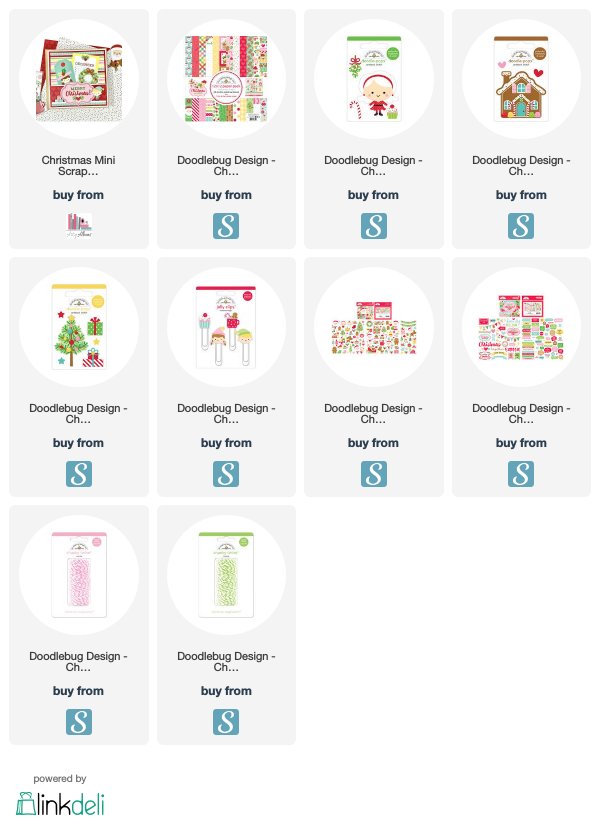
Supplies: Affiliate links are used in this post at no additional cost to you. I receive a small amount of compensation when you click through and shop using the provided links. This helps me to continue building my small business. Thank you!


Blog * Facebook * Instagram * Pinterest

Tuesday, November 26, 2019

Tuesday Tutorial: Christmas Card, Silhouette Sketch Pen

It's almost the season for sending out Christmas cards! If you're like me, sometimes the task can feel too time-consuming that I almost lose sight of the meaning for sending them. With that in mind, I remembered this card I made for a blog post over at Lori Whitlock Designs a few years back. I wanted to revisit the tutorial and share it with all of you because it's going to make creating my cards a lot more fun this year.

I used my Silhouette machine and some sketch pens to create the front of my card. The sketch pen technique involves cutting a shape from inside an offset that's been drawn with the pens.
 

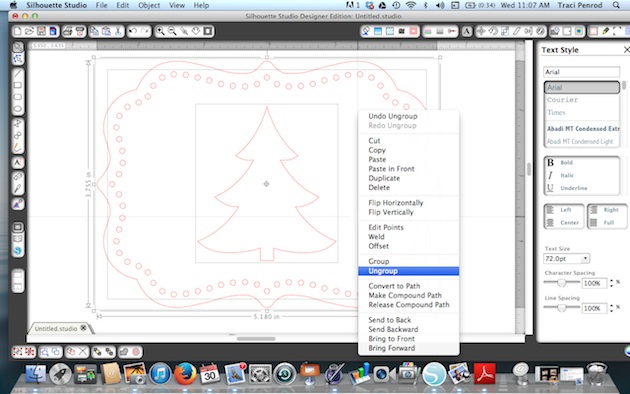
First, I started with Lori's adorable Christmas Tree Pop Up Card. I ungrouped everything and moved everything off to the side except the front panel with the tree.
 

Next, I ungrouped this one shape so that I could move the tree over to the left side of the shape.


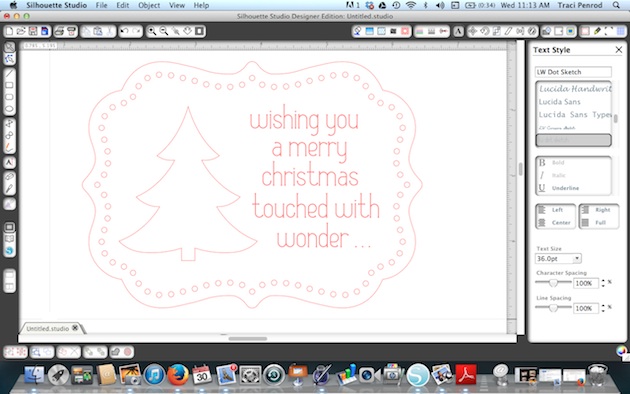
Once I moved the tree over to the left, I had space to put a sentiment. Using Lori's Dot Sketch Font, I typed in the sentiment that I wanted to use and centered everything the way I wanted it to look once it was sketched.
 

In addition to the sentiment, I also wanted an offset drawn around the tree cut out. To do this, I highlighted the tree, and opened the offset window. I clicked offset and set it to .05 distance.
 

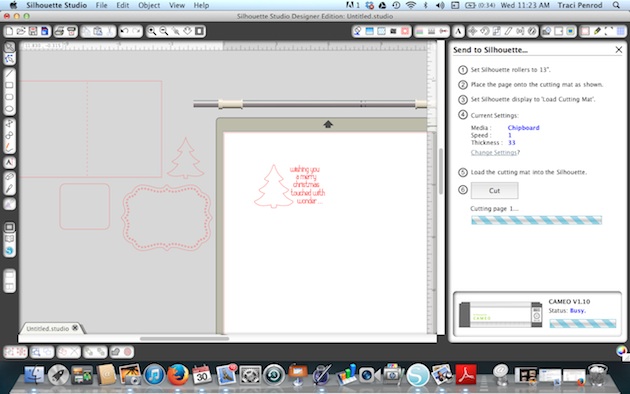
For the next step, I moved the inside tree shape, and the outer card shape, off to the side. These portions will be cut out, so I didn't want them to get sketched when I insert my pen.
 

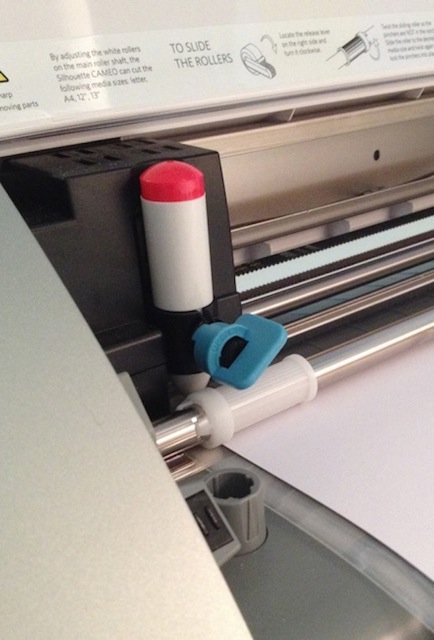
Next, I loaded white paper into my silhouette cameo machine and removed the blade. I replaced the blade with a red Silhouette sketch pen and locked it in place. Then I made sure my cut settings were set to Silhouette Sketch Pens, and I clicked "Cut".
 

Here is an important step! Once the sketch pen was finished drawing my lines, I didn't remove or unload my paper. The reason for this is because I want it to line up perfectly again when I go to cut the inside shape out of my tree. So I left the paper loaded exactly as it was when it was finished, and went back to my software.

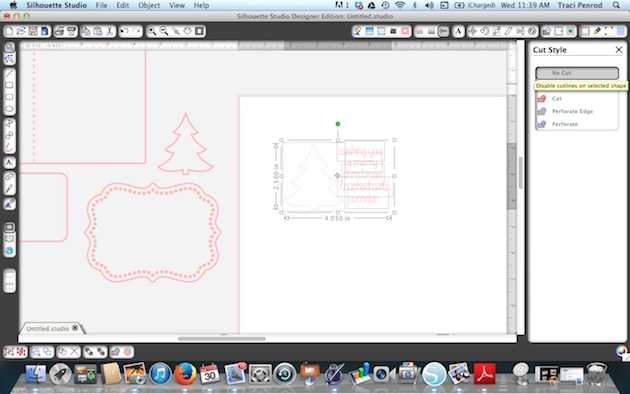
I highlighted everything that I had just sketched, and clicked on the Cut Style window. I chose "No Cut" so that when I replaced my red pen with a blade, everything I just sketched didn't get cut out.
 

Next I moved my card shape (which IS highlighted to cut) and the inner part of my tree (which IS highlighted to cut) back in place. I made sure that I replaced my red pen with my cutting blade, adjusted the cut setting to card stock, and hit the cut button again to tell my machine to cut out just those areas around my sketch.
 

For the inside of my card, I repeated the steps above to create a personalized "sketched" message inside the card before I cut it out.
One last tip -- I used a large needle to help thread my twine through the holes in the front of the card.


Thanks for stopping by the blog today for my "Tuesday Tutorial"!  If you plan to make your Christmas cards this year, I hope you have fun and enjoy the process :)


Blog * Facebook * Instagram * Shop

Thursday, November 21, 2019

Gift Card Stocking Banner

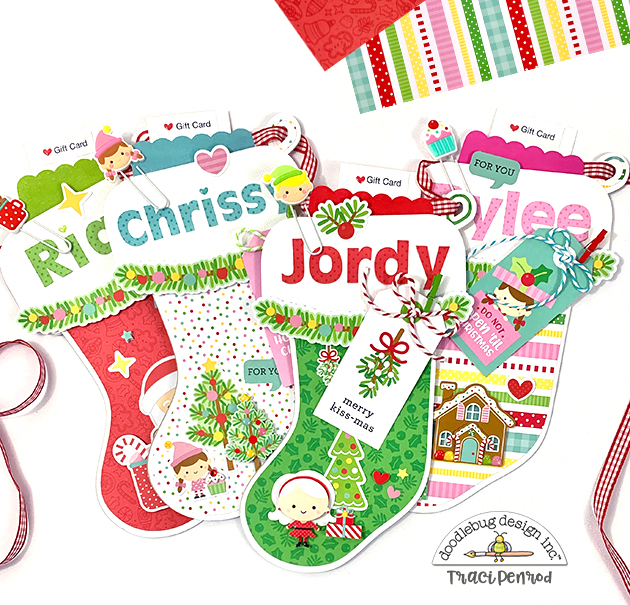
Hello friends! Now that my kids are older, they love getting gift cards for Christmas. So, when I saw this adorable stocking cut file it gave me a fun idea. I'll hang this banner up on Christmas morning and not only is it a festive decoration, but it's also a cute way to dress up these little cards.

 
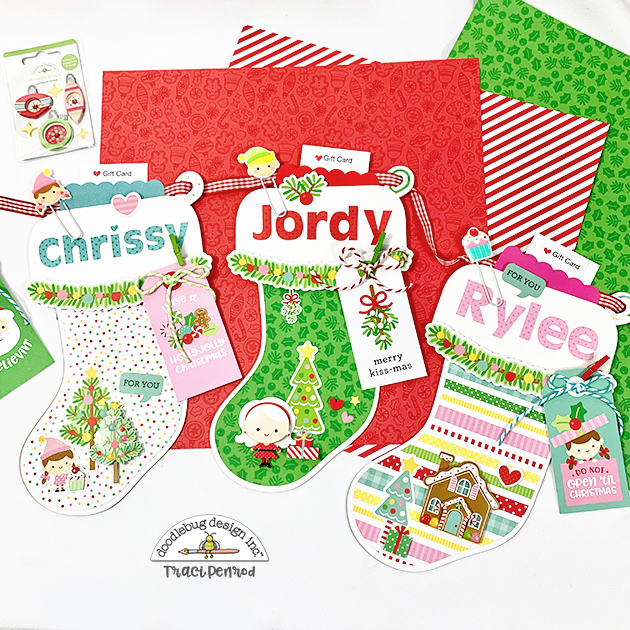
To make the stockings, I downloaded the Doodlebug Milk & Cookies Stocking cutting file from Lori Whitlock's SVG shop (link below). I separated the pieces and just kept the stocking base and white cuff portions. I enlarged the pieces so that the stocking measured 6.3" wide x 9.8" long.  
 
 
I cut out 4 stockings from thin chipboard, and 4 from white card stock. I made an internal offset of the stocking (set at 0.125) for the pattern paper and cut out 4 different patterns. 
 
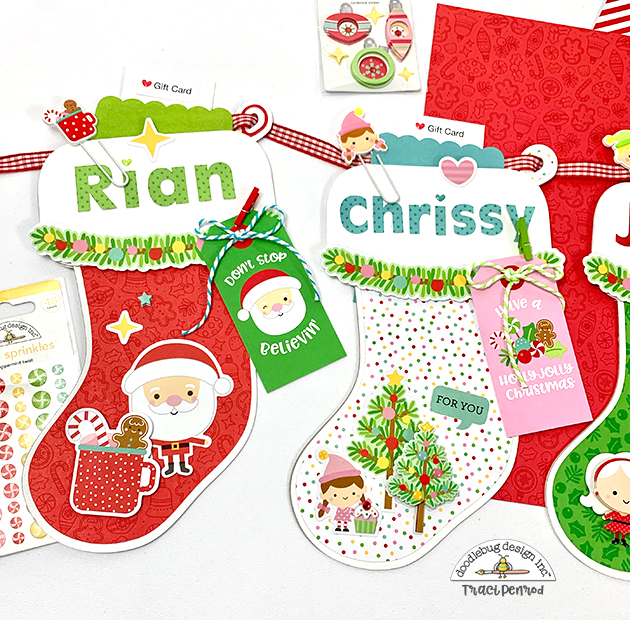
I layered the chipboard, white card stock, and some adorable pattern papers from the Doodlebug Christmas Magic collection. Then cut out and adhered the white cuff to the top. I added names to each stocking using my cutting machine and the Bubble Letter Font cut file by Lori Whitlock (link below). 

 
I attached Doodlebug's 3x3 scallop envelopes on the back of the stockings to hold the gift cards, and then had lots of fun embellishing each stocking with Christmas Magic odds & ends, doodle pops, and jelly clips.
 
 
Finally, I strung a ribbon through the stocking loops and secured it to the chipboard with help from the jelly clips. This was a really fun project and I can't wait to hang it up on Christmas morning!

Update: The Christmas Magic collection is an older one and some products might be harder to find. You can still find a few at Starlit Studios here. I've updated the links below to include Doodlebug's newer collections (Let It Snow and Night Before Christmas) as great substitutes. Happy Scrappin'!
 

Supplies: Affiliate links are used in this post at no additional cost to you. I receive a small amount of compensation when you click through and shop using the provided links. This helps me to continue building my small business. Thank you!


Blog * Facebook * Instagram * Shop

Wednesday, November 20, 2019

New! Safari Baby Journal

What's New Wednesday - I have an adorable new addition to the shop this week! 
This baby scrapbook journal is available as a do-it-yourself kit or preassembled. It's super cute, full of baby animals, is gender neutral, and will make a wonderful keepsake for all of those treasured newborn memories and milestones!

It's a beautiful little journal album for a new baby. Give it as a gift for a newborn, or fill it with all of the memories of your own little bundle of joy. Pictures and details of a sweet little baby will be treasured for years to come in this precious book.


The album measures 8x8 inches and includes 12 heavy chipboard pages (6 front & back). Page details include space for:
Birth information
First Photo
Family Tree
First Home
Growth Chart
Hand and Footprint pages
Memorable Firsts
and space for 25 photos.

Pre-made:
If you order the album pre-made, it will be shipped completely assembled and ready for photos or gift-giving.

Do-It-Yourself Kit:
You can also order this album as a do-it-yourself kit!
The pre-cut scrapbook kit includes all of the materials and instructions to make this adorable mini album!

Included in the Kit:
8x8 Chipboard Album (by Prima)
Precut pattern paper (by Paper Studio)
Pre cut photo mats and card stock
Pull-Outs, Journaling cards
Coordinating Stickers
Layered embellishments
Full Color instructions

Tools & supplies you will need to complete this project:
Paper trimmer and/or scissors
Adhesive -- wet and dry
Pop Dots or other dimensional adhesive
Thin glue pen


To stay up to date on new product, coupons, and giveaways..."Like" Artsy Albums on Facebook at: www.facebook.com/artsyalbums or instagram @artsyalbums

As always, thank you so much for visiting my shop! My goal is to create scrapbooks, memory albums, and kits that encourage people to share their stories, preserve their photos, and document their everyday lives.

Blog * Facebook * Instagram * Pinterest

Tuesday, November 19, 2019

Tuesday Tutorials: Winter Waterfall Album

Hello friends! I have a great tutorial today showing you how to make my super cute Winter Waterfall Album! This is a different way to save lots of fun photos in a smaller album. The paper I used was designed by Lori Whitlock for Echo Park.  It's called My Favorite Winter and I just love the colors and cute little snowmen in this collection! Take a look ....


When you open the folio-style album, there is a pocket on the left side and the waterfall pages on the right. The pocket is a great place to add journaling, extra photos or memorabilia like tickets or brochures.

Here are a few of the waterfall pages. They each flip up to reveal fun embellishments and lots of photo mats.


Here are the instructions for making a waterfall album like this. For simplicity, I didn't include directions for placement of each pattern paper or embellishment.  That's where you can add your creative touch, but all of the measurements are included :)  And remember ... any collection will work with this project!  It doesn't have to be winter.  Have fun!

Winter Waterfall Folio Tutorial

12x12 Dark Blue card stock:
  1. Cut blue card stock to 9” x 12”.
  2. Position card stock on your score board so that the 12” width is at the top.
  3. Score the card stock across left to right at .5”, 5.5”, 6.5” and 11.5”.
  4. Turn the paper 1/4 turn to the left and score at .5” and 8.5”.
  5. Trim out the corners as shown below.
12x12 Medium Weight Chipboard:
  1. Cut chipboard into 3 pieces — 8” x 4 3/4” (2), and 8”x 1”.
  2. Adhere the chipboard pieces to the blue card stock as shown.  Be sure to leave some space between each piece so that the album cover will fold properly.
  3. Adhere the folds of the blue card stock down on the chipboard.
12x12 Dark Blue Card stock (not shown):
  1. Cut blue card stock to 10 3/4” x  7 3/4”.
  2. Adhere this piece over the chipboard on the inside of your album cover, making sure to crease the card stock so that it folds at the spine and covers the chipboard.
12x12 pattern paper:
  1. Cut the pattern paper for the inside cover — 4 5/8” x 7 3/4” (2), and 1” x 7 3/4”.
  2. Adhere them inside the cover as shown.

12x12 Pattern Paper / 12x12 Blue Card Stock / Ribbon:
  1. Cut the pattern paper for the outside cover — 4 5/8” x 7 3/4” (2).
  2. Cut a piece of pattern paper 1" x 7 3/4" for the spine.
  3. Cut another piece of pattern paper to 4” x 4 1/4”.  Set aside.
  4. Adhere a 20” piece of ribbon across the center of the cover.
  5. Adhere the pattern paper over the blue card stock and ribbon as shown. Adhere the 1" piece down the spine also (not shown).

Cut Blue Card stock for inside of album:
  1. 4” x 7 1/2” — base of waterfall
  2. 4” x 4 1/2” (7) scored at 1/2” to create seven 4x4 squares.
  3. 4 1/4” (width) x 4 1/2” (height) — pocket (see next set of instructions to complete pocket)
Create the Pocket:
  1. To trim the corner of the blue card stock for the pocket, measure 3/4″ over from the top left hand edge and make a mark.  
  2. From the right hand bottom edge, measure up 3/4″ and make a mark.  
  3. Draw a line from mark to mark and cut off the corner piece. 
  4. Locate the pattern paper you set aside earlier.  Lay the pattern side up and match the long and short sides of the pattern sheet, with the long and short sides of the blue pocket piece.  
  5. Once you are sure you have the correct sides matched up, measure 1/2″ over from the left hand top edge and make a mark.  From the right hand bottom edge, measure up 1/2″ and make a mark.
  6. Draw a line from mark to mark and cut off the corner piece.  Adhere the card stock and pattern pieces together.
  7. Adhere the pocket to the inside left panel of your album ... be sure to put adhesive on the left and bottom sides only so that your inserts will slide behind.

Assemble the Waterfall pieces:
  1. Apply glue to the scored and folded tab of each 4x4 square.  Adhere the first “tab” along the top edge of the waterfall base.
  2. Adhere the second square by lining the “tab” up along the bottom edge of the previous tab. Be sure not to overlap the edge of the previous square.   
  3. Adhere the waterfall element to the inside right panel of your album.


6x6 Paper Pad:
  1. Cut 6x6 pattern paper for each of the squares — 3 3/4” x 3 3/4” (15)
  2. Cut 6x6 pattern paper for the spaces in between the squares — 3/8” x 3 3/4” (7)

I hope this gives you some fun ideas for creating a unique mini! Have fun mixing and matching papers and embellishments ... that's always my favorite part!
 
 
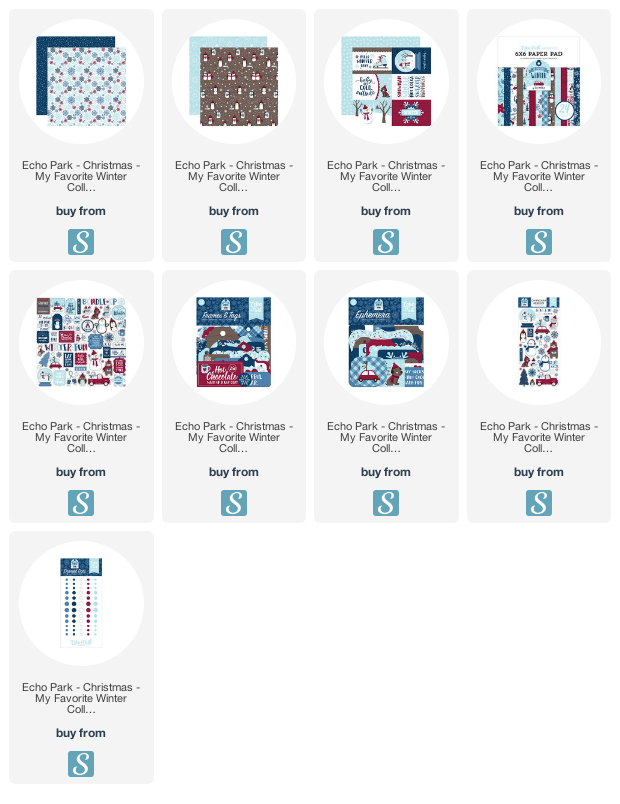
Supplies: Affiliate links are used in this post at no additional cost to you. I receive a small amount of compensation when you click through and shop using the provided links. This helps me to continue building my small business. Thank you!


Blog * Facebook * Instagram * Pinterest