Thursday, March 26, 2015
Print & Cut Silhouette Tutorial with Lori Whitlock Designs

Wednesday, March 25, 2015
I AM Scrapbook Album with Simple Stories
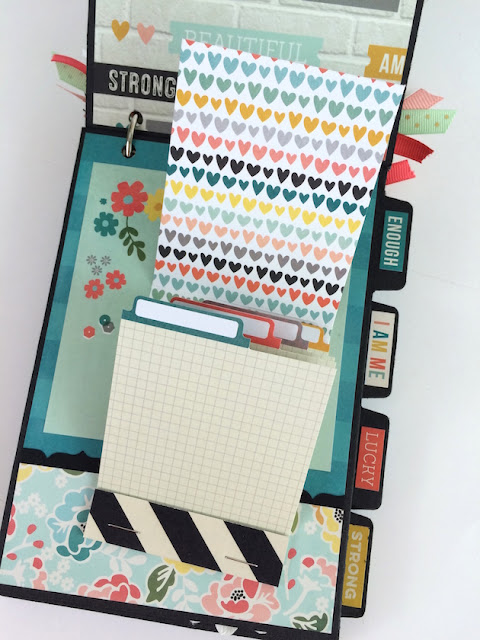
This is an amazing keepsake filled with reminders that you are strong, beautiful, lucky, happy, thankful, blessed, and ... enough. My kit comes with lots of phrases so you can personalize your album with words that represent you and your experiences.
There are 12 chipboard pages (6 front and back) that include 1 fold-out, 3 flippies, and space for at least 12 photos / journaling. I also added this super fun interactive matchbook element shown in the photo above. It has such cute flip-through pages for journaling or small photos.
Here's an awesome fold out page. It opens to the left and inside, has a lined card with words to write about what you are: reading, watching, loving, being, feeling, and dreaming.
Since we always tend to focus on our children, family, friends, and others before ourselves ... this is a nice way to document our own lives for a change. Do it. Because someday, someone will want to know. :)
As always, thanks so much for stopping by. Hop over to my shop to get yours and to see all the newest kits, premades, instructions, and supplies!
Blog * Shop * Facebook * Instagram * Pinterest
Friday, March 20, 2015
We R Memory Keepers 2015 Design Team
Just wanted to hop on the blog this morning to share some wonderful news with you!
I was asked to join the We R Memory Keepers Design team again for 2015! I am super excited to be a part of this amazing team of talented ladies. In the past, my role for We R was to design projects for their CHA and Home Shopping Network samples and their catalog. This year, I'll be a regular contributor to the We R Memory Keepers Blog. I hope you'll hop over to their site today, leave a comment and start following this awesome company if you don't already.
I also want to send a shout out to my new team members with a big congrats!! Can't wait to work with all of you!

Monday, March 16, 2015
12x12 Lucky Family Scrapbook Layout
Hey guys! Today, I have a great 12x12 layout to share with you just in time for St. Patrick's Day. Doodlebug asked their Design Team to find a past Doodlebug project that inspired them and then recreate their own version. This was hard - Doodlebug has so many great projects! But, I finally decided on the sequin title on Mendi's adorable Mouse Mania layout (see below). I created a 12x12 layout with my fabulous family.💚
I used a bunch of pretty colored Petite Prints, a few shamrock icon stickers from Doodlebug's Happy Go Lucky Collection, and lots of gorgeous sequins! (Links below.)
Here's a close-up of Doodlebug's awesome shimmering sequins. Aren't they beautiful?
Isn't this title great?! Click HERE to see Mendi's original post where she walks you through how to create it.
I hope this inspires you. Below are the links for the products used in this layout. Thanks for stopping by and have a great day!
Blog * Shop * Facebook * Instagram * Pinterest


