It's almost the season for sending out Christmas cards! If you're like me, sometimes the task can feel too time-consuming that I almost lose sight of the meaning for sending them. With that in mind, I remembered this card I made for a blog post over at Lori Whitlock Designs a few years back. I wanted to revisit the tutorial and share it with all of you because it's going to make creating my cards a lot more fun this year.
I used my Silhouette machine and some sketch pens to create the front of my card. The sketch pen technique involves cutting a shape from inside an offset that's been drawn with the pens.
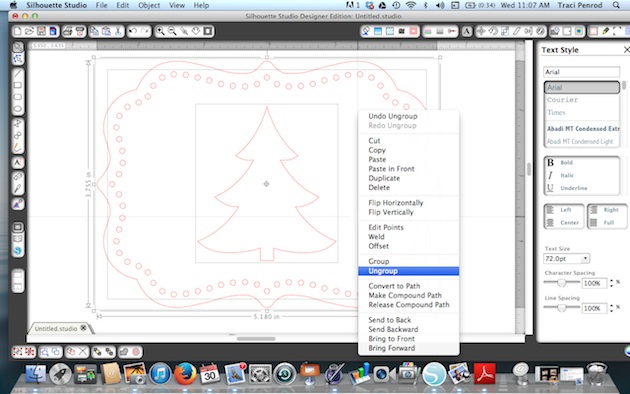
First, I started with Lori's adorable Christmas Tree Pop Up Card. I ungrouped everything and moved everything off to the side except the front panel with the tree.

Next, I ungrouped this one shape so that I could move the tree over to the left side of the shape.

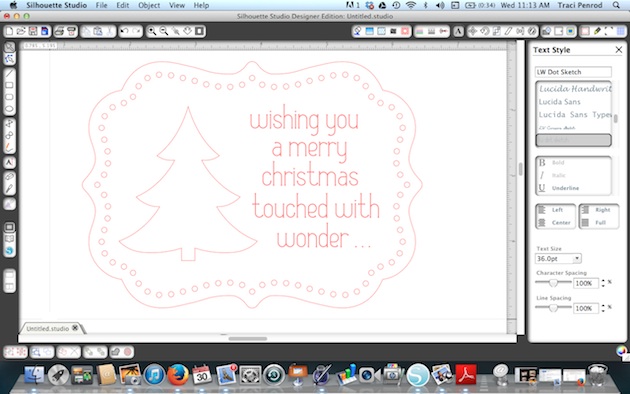
Once I moved the tree over to the left, I had space to put a sentiment. Using Lori's Dot Sketch Font, I typed in the sentiment that I wanted to use and centered everything the way I wanted it to look once it was sketched.
In addition to the sentiment, I also wanted an offset drawn around the tree cut out. To do this, I highlighted the tree, and opened the offset window. I clicked offset and set it to .05 distance.

For the next step, I moved the inside tree shape, and the outer card shape, off to the side. These portions will be cut out, so I didn't want them to get sketched when I insert my pen.
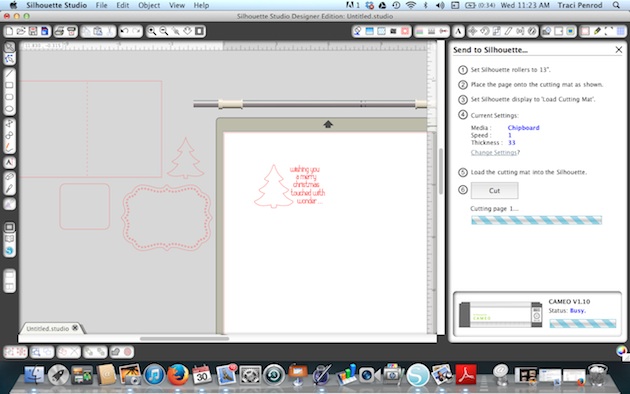
Next, I loaded white paper into my silhouette cameo machine and removed the blade. I replaced the blade with a red Silhouette sketch pen and locked it in place. Then I made sure my cut settings were set to Silhouette Sketch Pens, and I clicked "Cut".
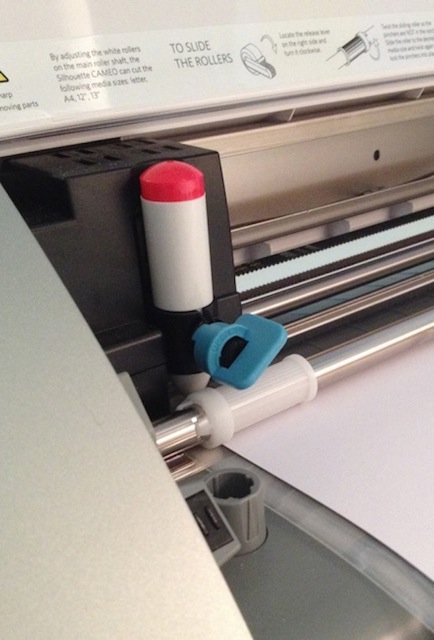
Here is an important step! Once the sketch pen was finished drawing my lines, I didn't remove or unload my paper. The reason for this is because I want it to line up perfectly again when I go to cut the inside shape out of my tree. So I left the paper loaded exactly as it was when it was finished, and went back to my software.
I highlighted everything that I had just sketched, and clicked on the Cut Style window. I chose "No Cut" so that when I replaced my red pen with a blade, everything I just sketched didn't get cut out.
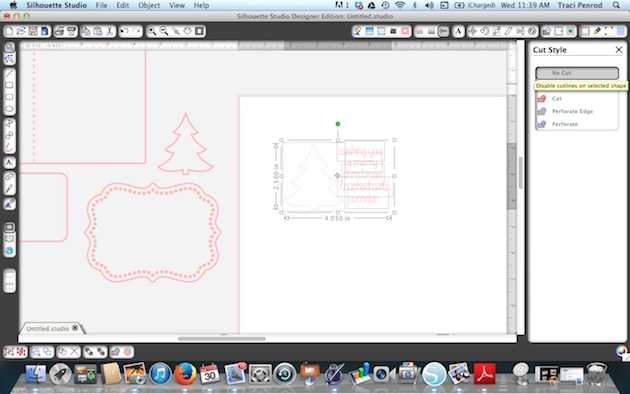
Next I moved my card shape (which IS highlighted to cut) and the inner part of my tree (which IS highlighted to cut) back in place. I made sure that I replaced my red pen with my cutting blade, adjusted the cut setting to card stock, and hit the cut button again to tell my machine to cut out just those areas around my sketch.

For the inside of my card, I repeated the steps above to create a personalized "sketched" message inside the card before I cut it out.
One last tip -- I used a large needle to help thread my twine through the holes in the front of the card.


Thanks for stopping by the blog today for my "Tuesday Tutorial"! If you plan to make your Christmas cards this year, I hope you have fun and enjoy the process :)

Blog * Facebook * Instagram * Shop


No comments:
Post a Comment